Complete Walkthrough for Dragon Quest III: Baramos's Lair
Author : Riley
Feb 11,2025
Conquer Baramos's Lair in Dragon Quest 3 Remake: A Comprehensive Guide
After securing the Six Orbs and hatching Ramia the Everbird, you're ready to tackle Baramos's Lair in Dragon Quest 3 Remake. This challenging dungeon serves as a crucial test before venturing into the underworld. This guide details how to locate and complete Baramos's Lair in the HD-2D Remake.
Baramos's Lair is the formidable stronghold of the Archfiend Baramos, the primary antagonist in the game's first half. Access is granted only after obtaining Ramia. Aim for a party level of at least 20 before attempting this challenge. The lair holds valuable items, detailed in the sections below.
How to Reach Baramos's Lair
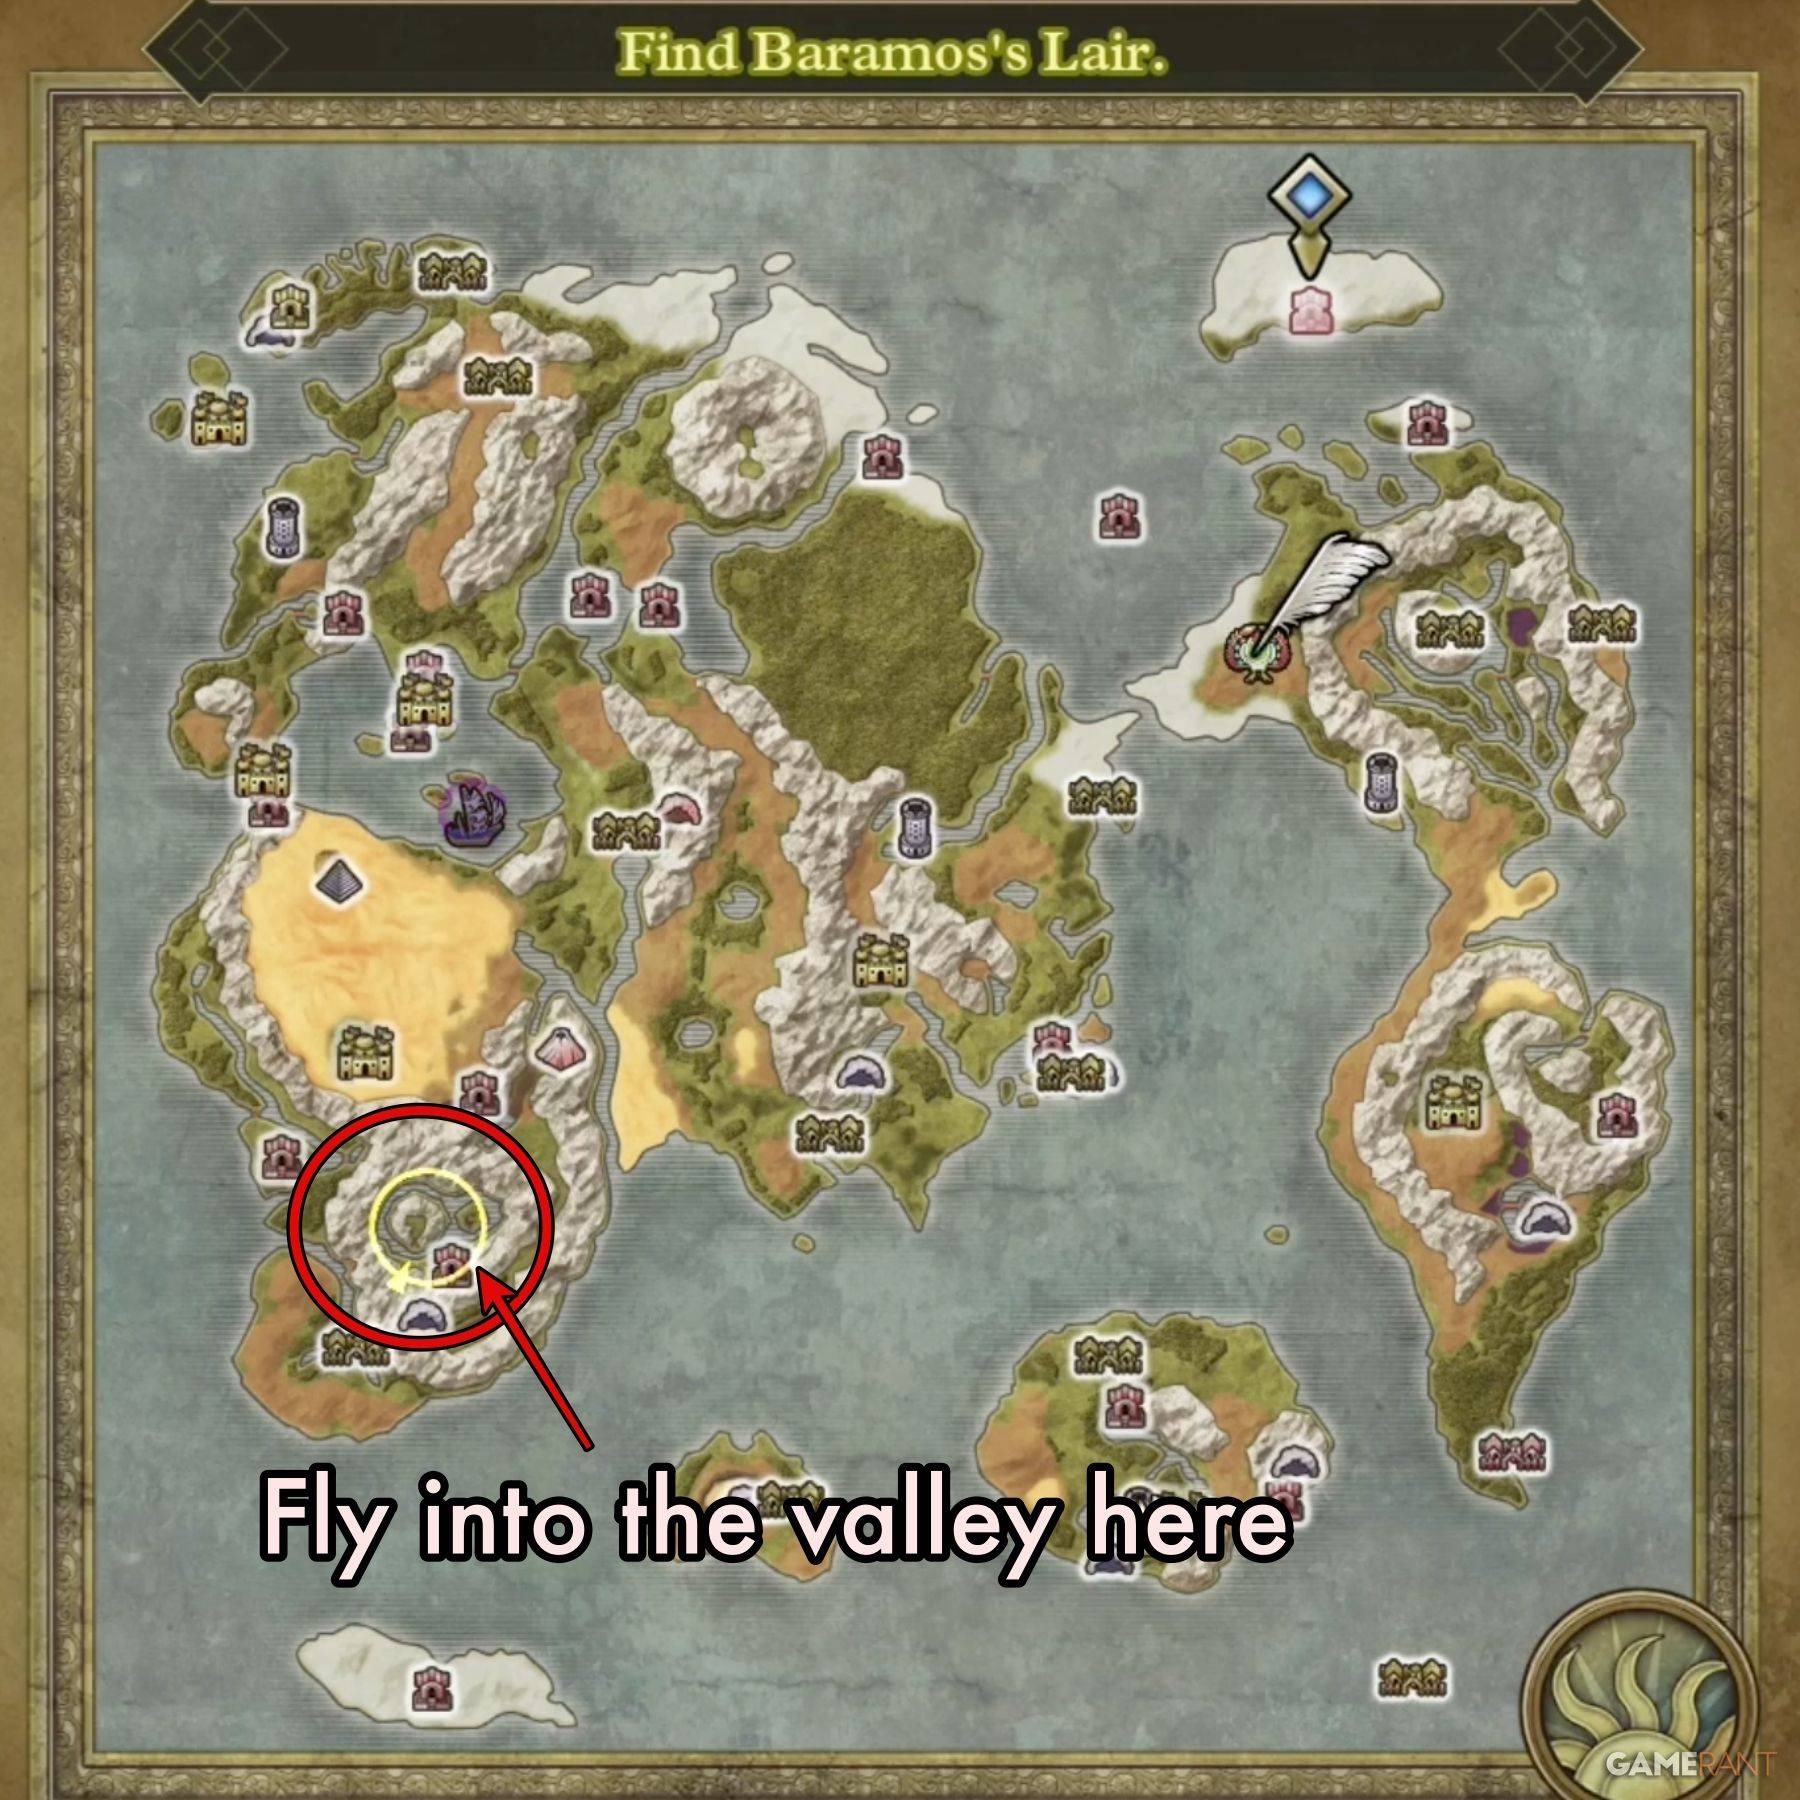
Having acquired the Silver Orb from the Maw of the Necrogond and unlocked Ramia, you can fly directly to Baramos's Lair from either the Shrine of the Everbird or the Necrogond Shrine.
North of the Necrogond Shrine lies an island nestled amidst mountains—this is Baramos's Lair. Ramia will transport you to the dungeon's entrance. Proceed north and enter.
Baramos's Lair Walkthrough
Baramos's Lair deviates from typical dungeon structures. Instead of linear progression, you'll navigate indoor and outdoor areas to reach Baramos. The main outdoor area, "Surroundings," serves as a central hub. Below is the main path to the boss, with treasure locations detailed separately.
Reaching Baramos:
- Upon entering the lair, bypass the main entrance. Instead, circle the eastern side towards the northeastern pool.
- Ascend the stairs near the pool, turn west, and climb another set of stairs. Enter the door on your right (Eastern Tower).
- Reach the top of the Eastern Tower and exit.
- Cross the castle roof southwest, descend the stairs, and navigate west through gaps in the northwestern double wall. Use the northwestern stairs.
- Enter the Central Tower. Use "Safe Passage" to cross electrified floor panels and descend the southwestern stairs to B1 Passageway A.
- In B1 Passageway A, proceed east to the eastern stairs.
- Enter the South-East Tower. Ascend the northeastern stairs to the roof, then head west and descend to the western section. Cross the grass northwest and enter the door.
- Exit the short section in the northeastern corner of the Central Tower.
- In B1 Passageway B, proceed north and ascend the stairs.
- Enter the Throne Room, avoiding floor panels, and exit south.
- In the "Surroundings" area, locate the northeastern structure (Baramos's Den) on the island for the final confrontation.
All Treasure in Baramos's Lair
Surroundings:
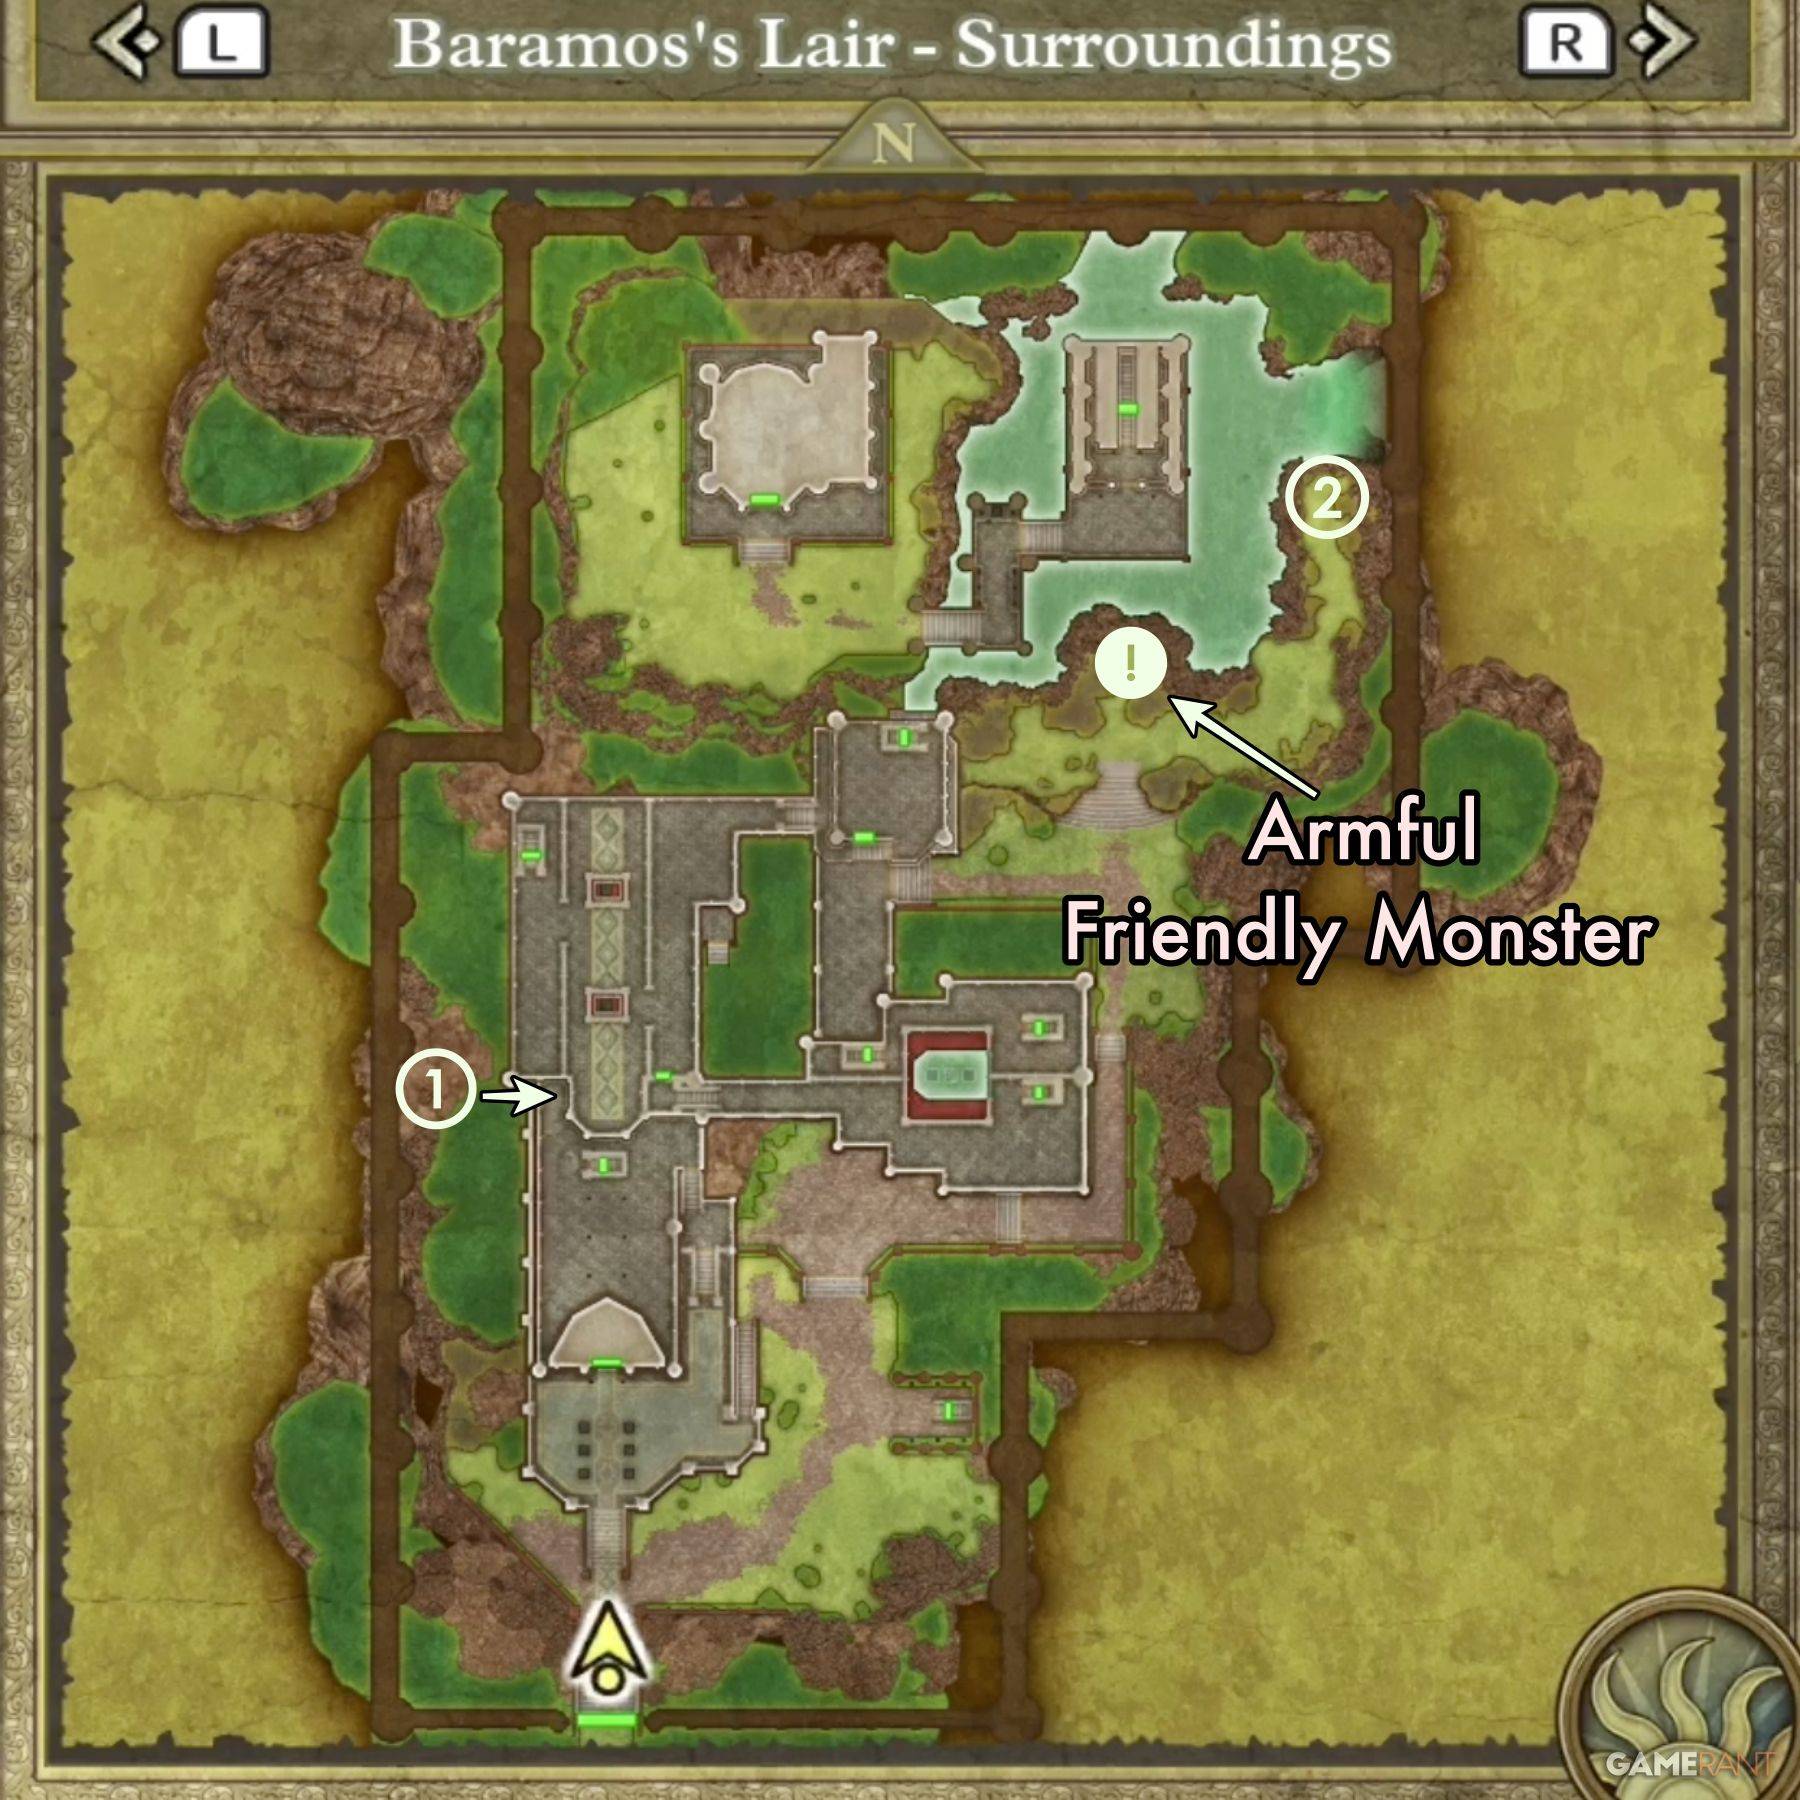
- Treasure 1 (Chest): Prayer Ring
- Treasure 2 (Buried): Flowing Dress
Central Tower:
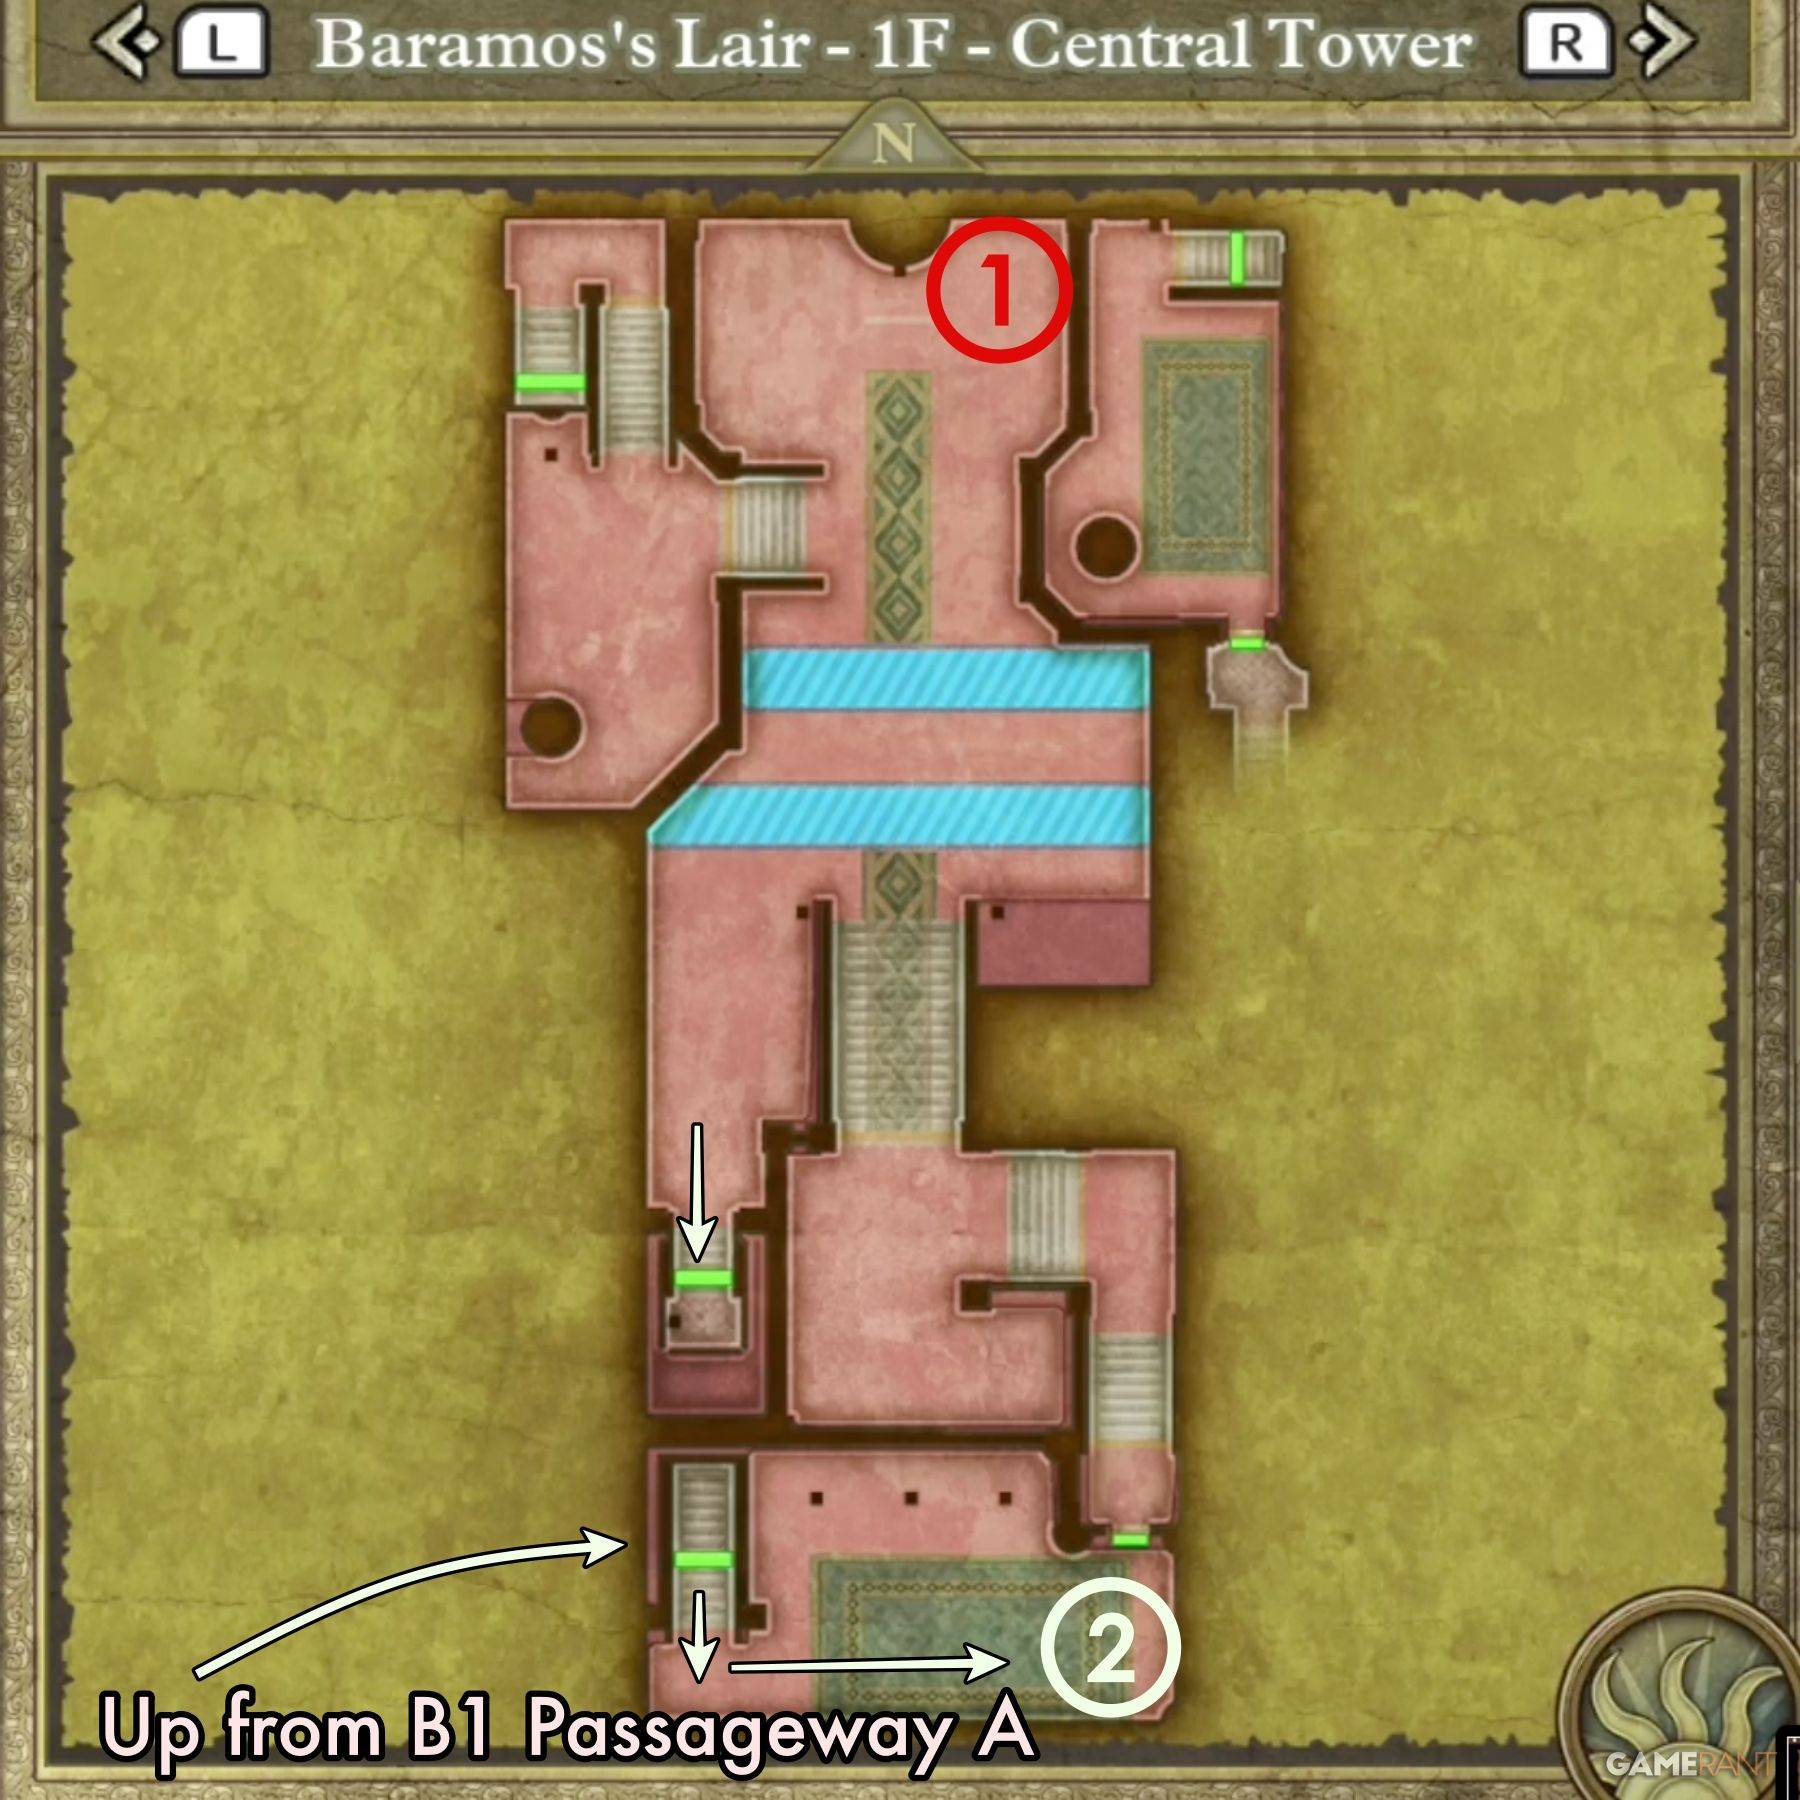
- Treasure 1: Mimic (enemy)
- Treasure 2: Dragon Mail
South-East Tower:
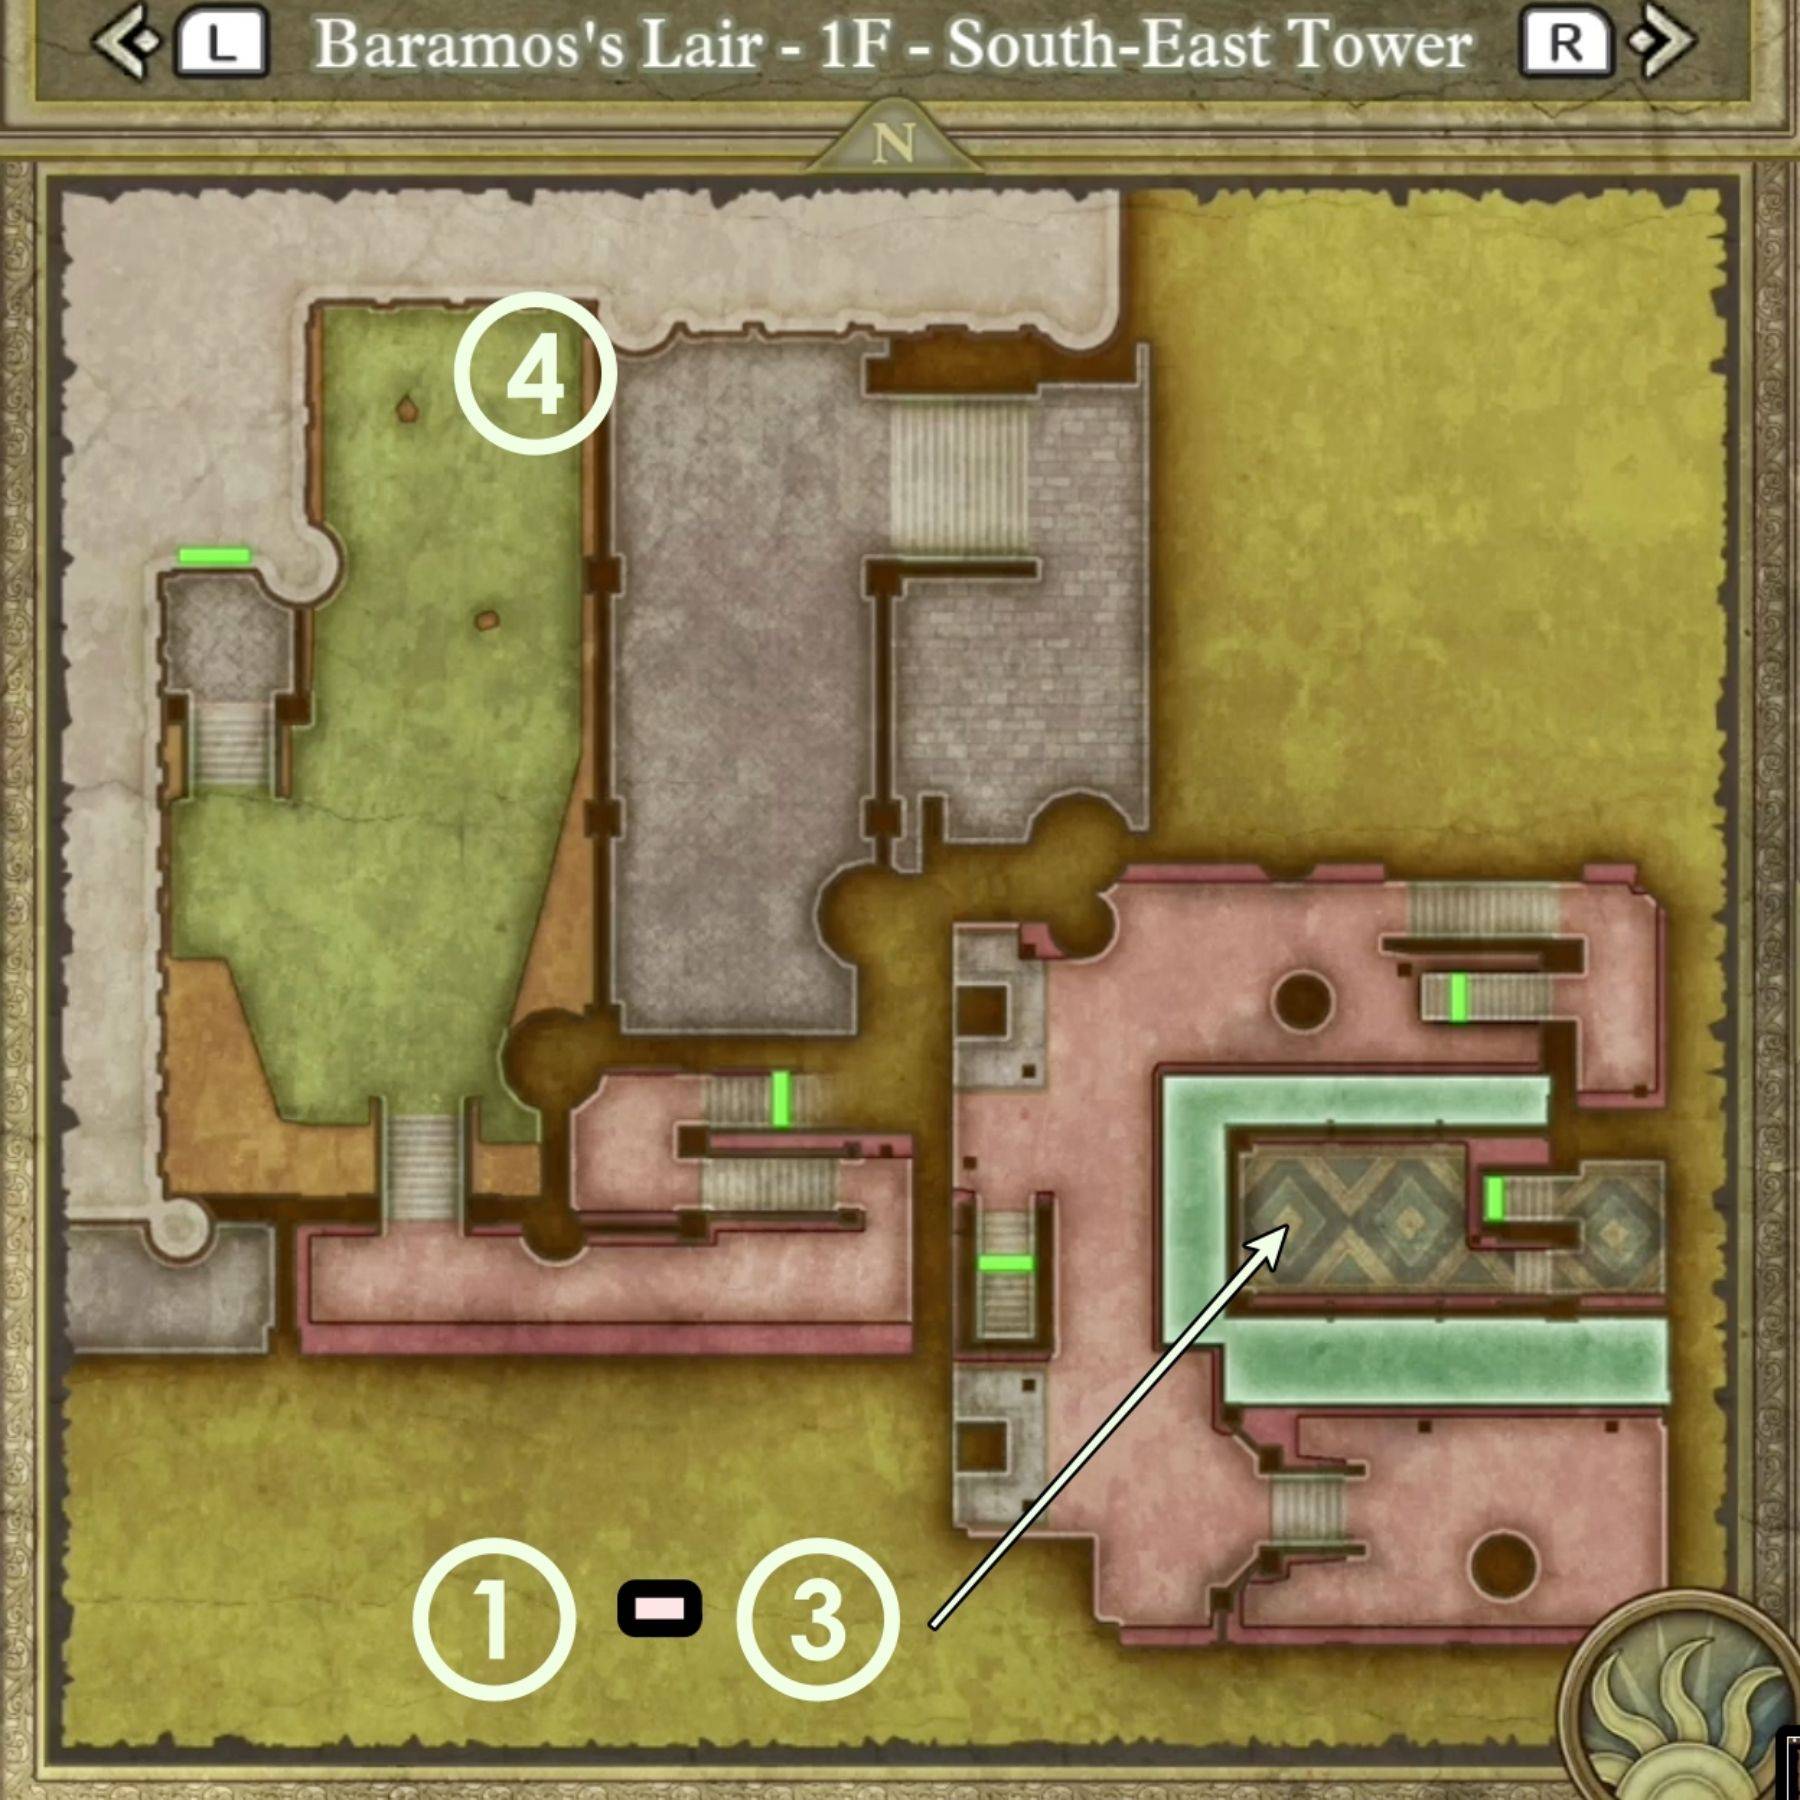
- Treasure 1 (Chest): Hapless Helm
- Treasure 2 (Chest): Sage's Elixir
- Treasure 3 (Chest): Headsman's Axe
- Treasure 4 (Chest): Zombiesbane
B1 Passageway:
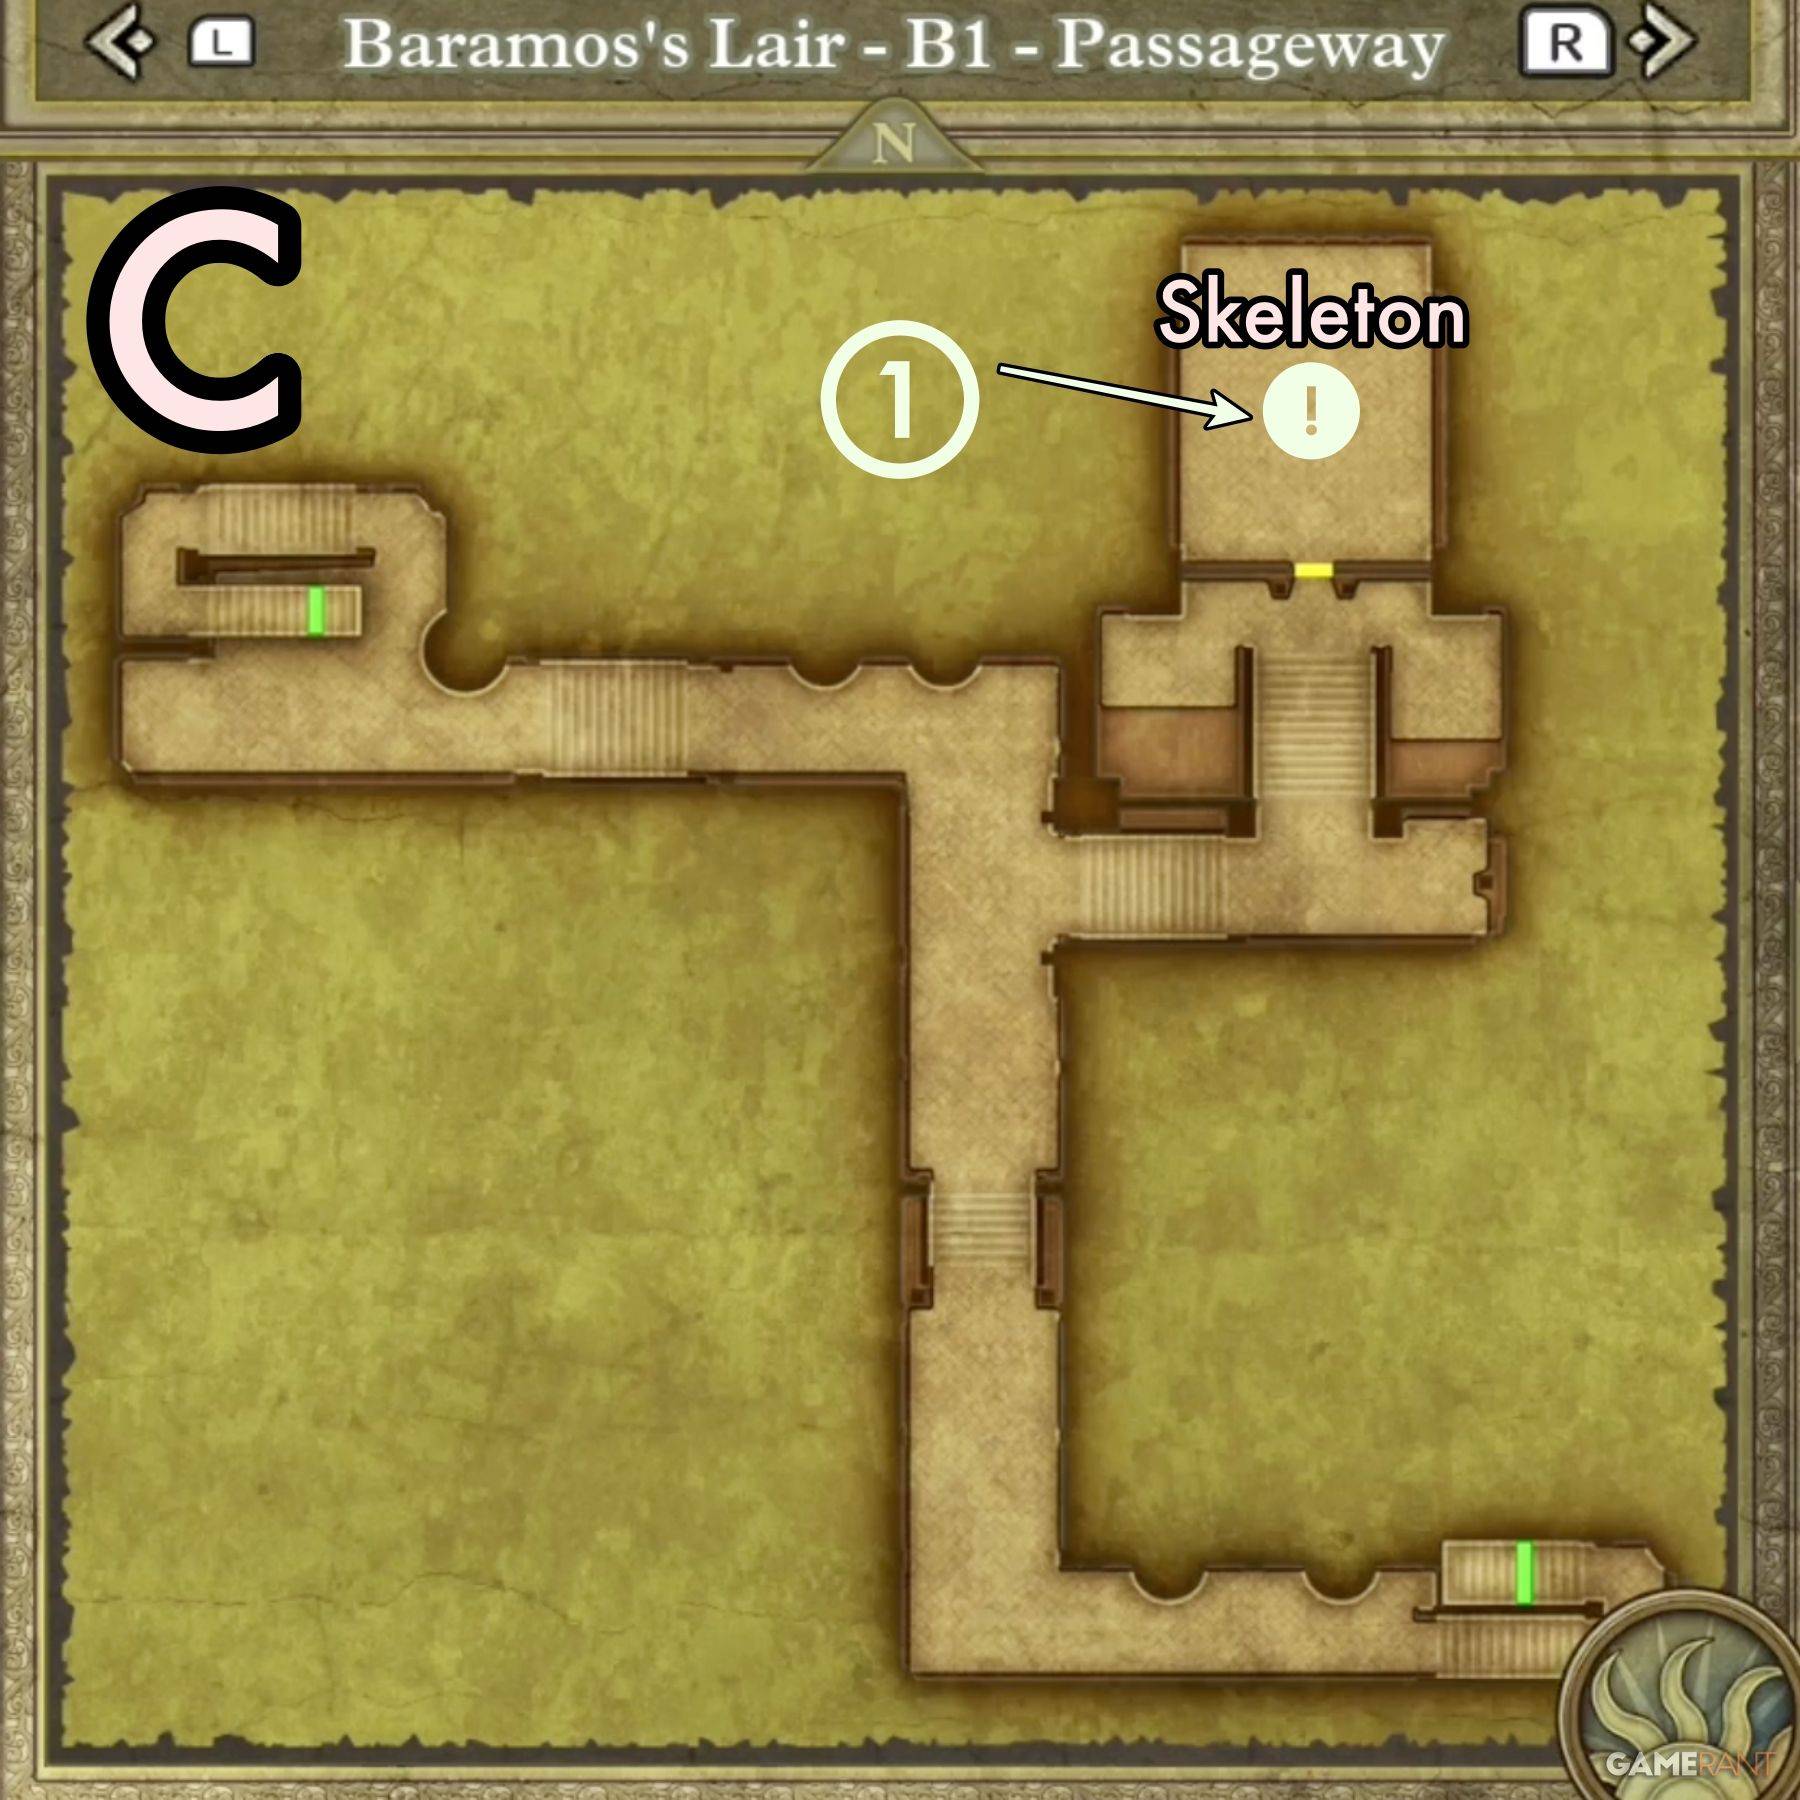
- Treasure 1 (Buried): Mini Medal
Throne Room:

- Treasure 1 (Buried): Mini Medal
Defeating Baramos
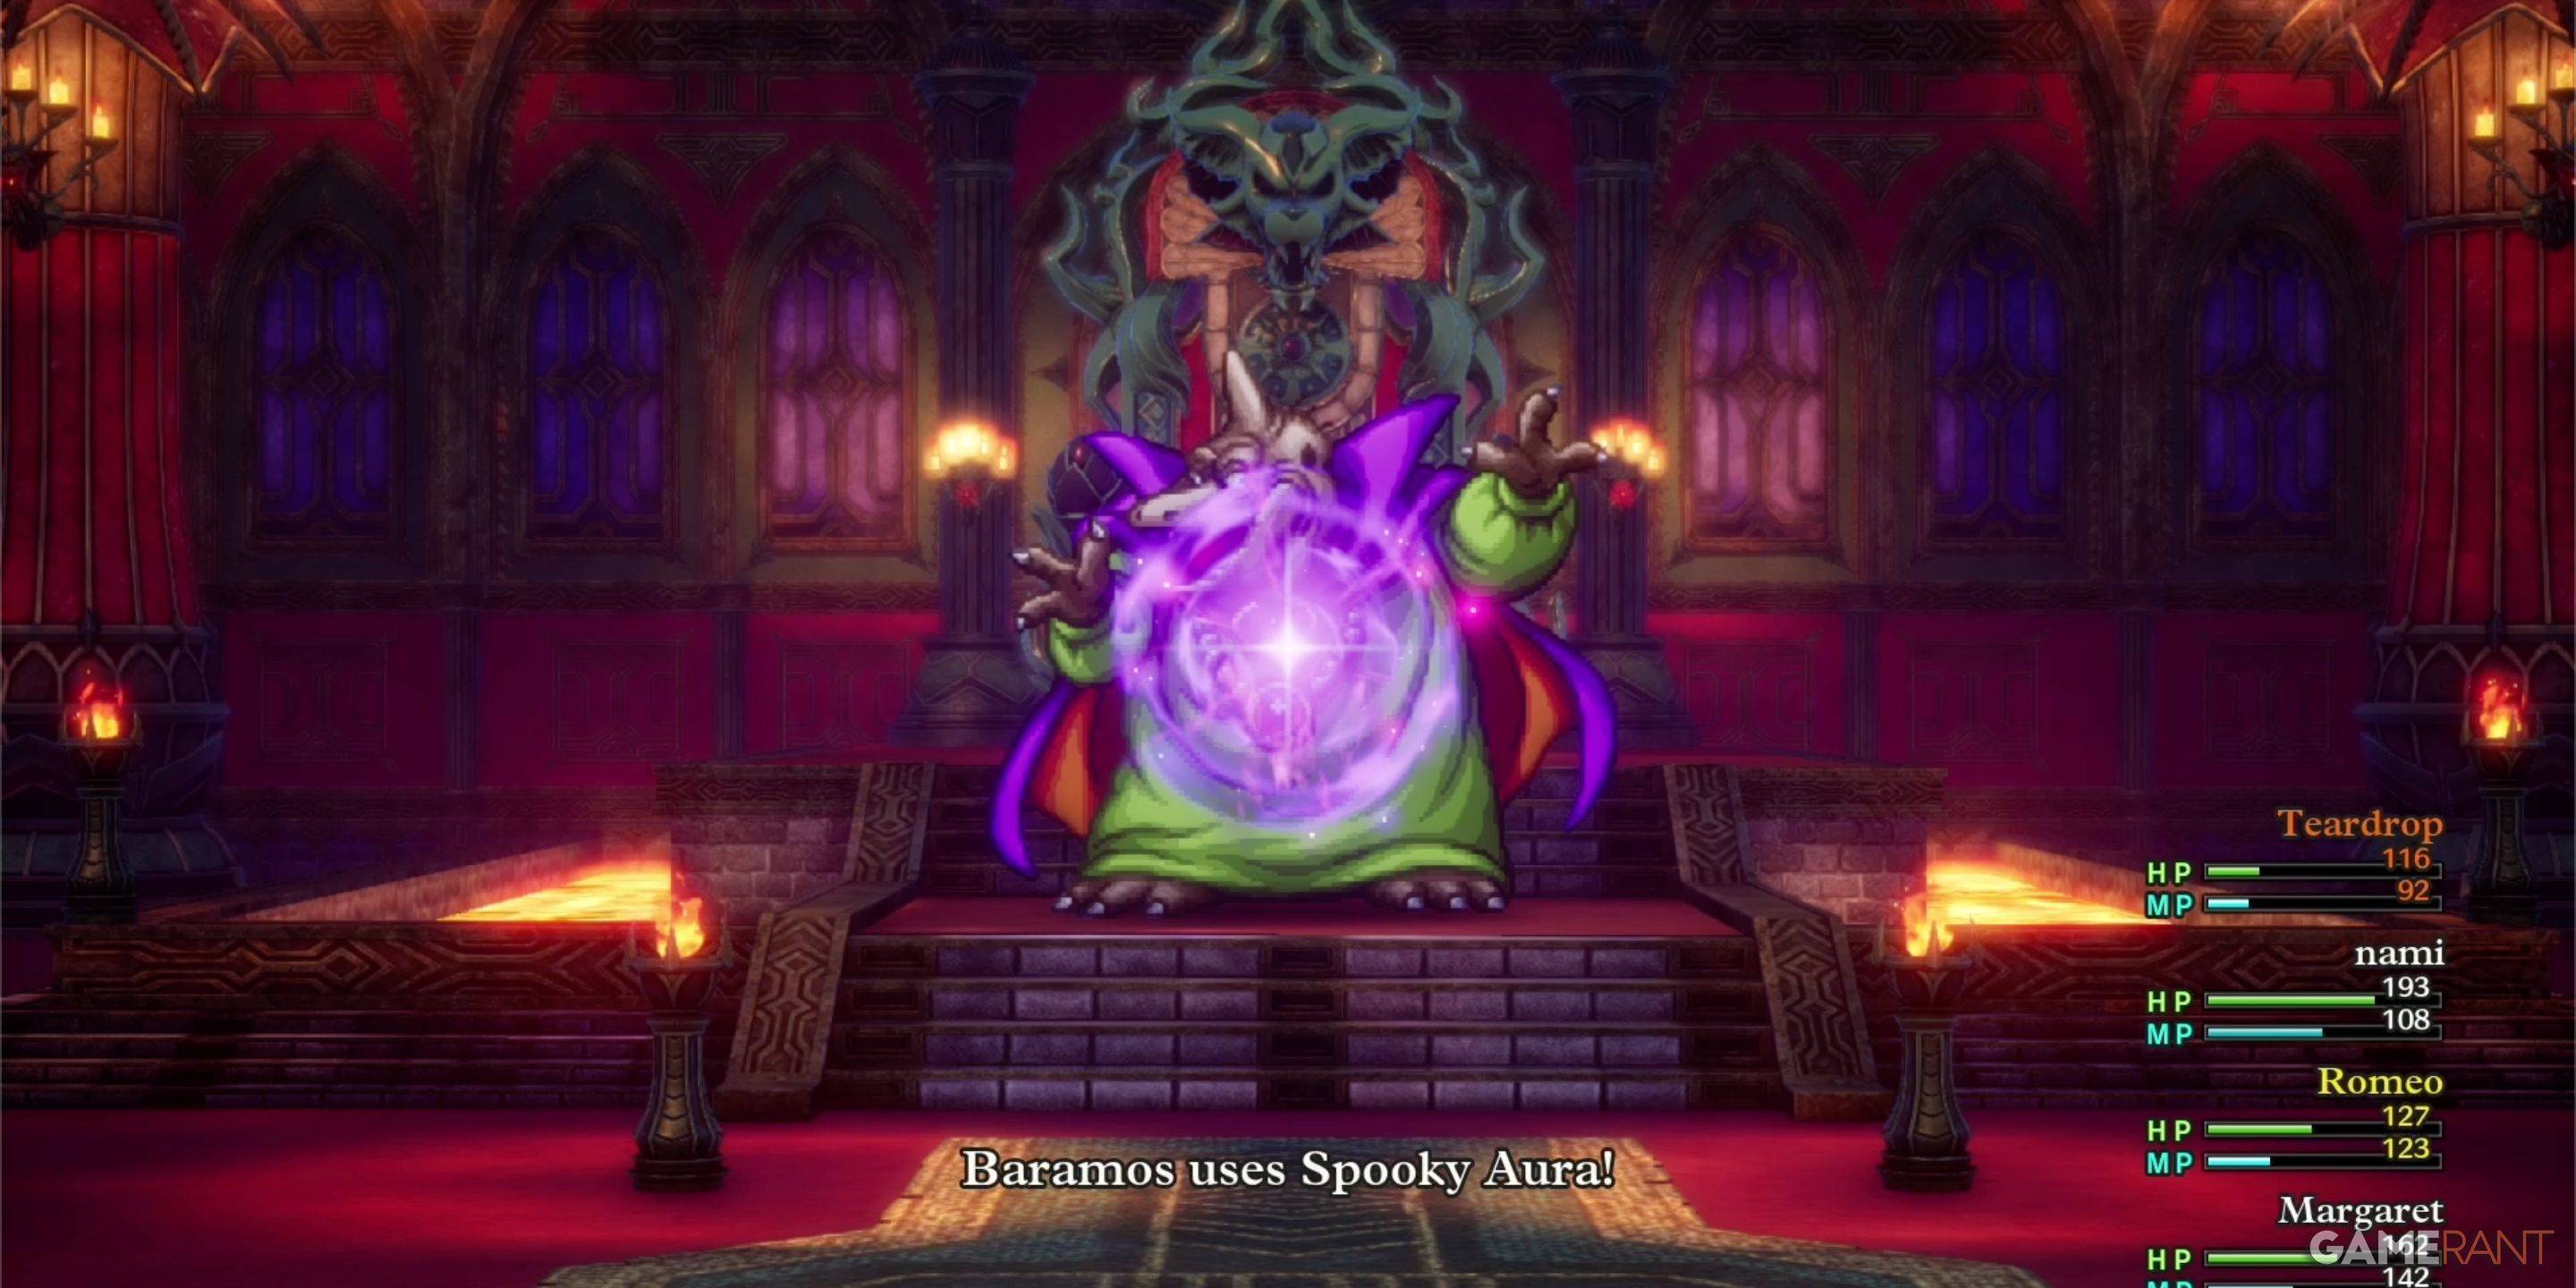
Baramos is a formidable opponent. Strategic planning and appropriate party levels are crucial.
Baramos's Weaknesses:
- Crack (Ice-based spells)
- Whoosh (Wind-based spells)
Utilize high-level spells like Kacrack and Swoosh, ensuring adequate healing throughout the battle.
Every Monster in Baramos's Lair

| Monster Name | Weakness |
|---|---|
| Armful | Zap |
| Boreal Serpent | TBD |
| Infanticore | TBD |
| Leger-De-Man | TBD |
| Living Statue | None |
| Liquid Metal Slime | None |
| Silhouette | Varies |
This comprehensive guide should equip you to successfully navigate Baramos's Lair and emerge victorious. Remember to utilize your party's strengths and exploit Baramos's weaknesses for a smoother experience.
Latest Articles
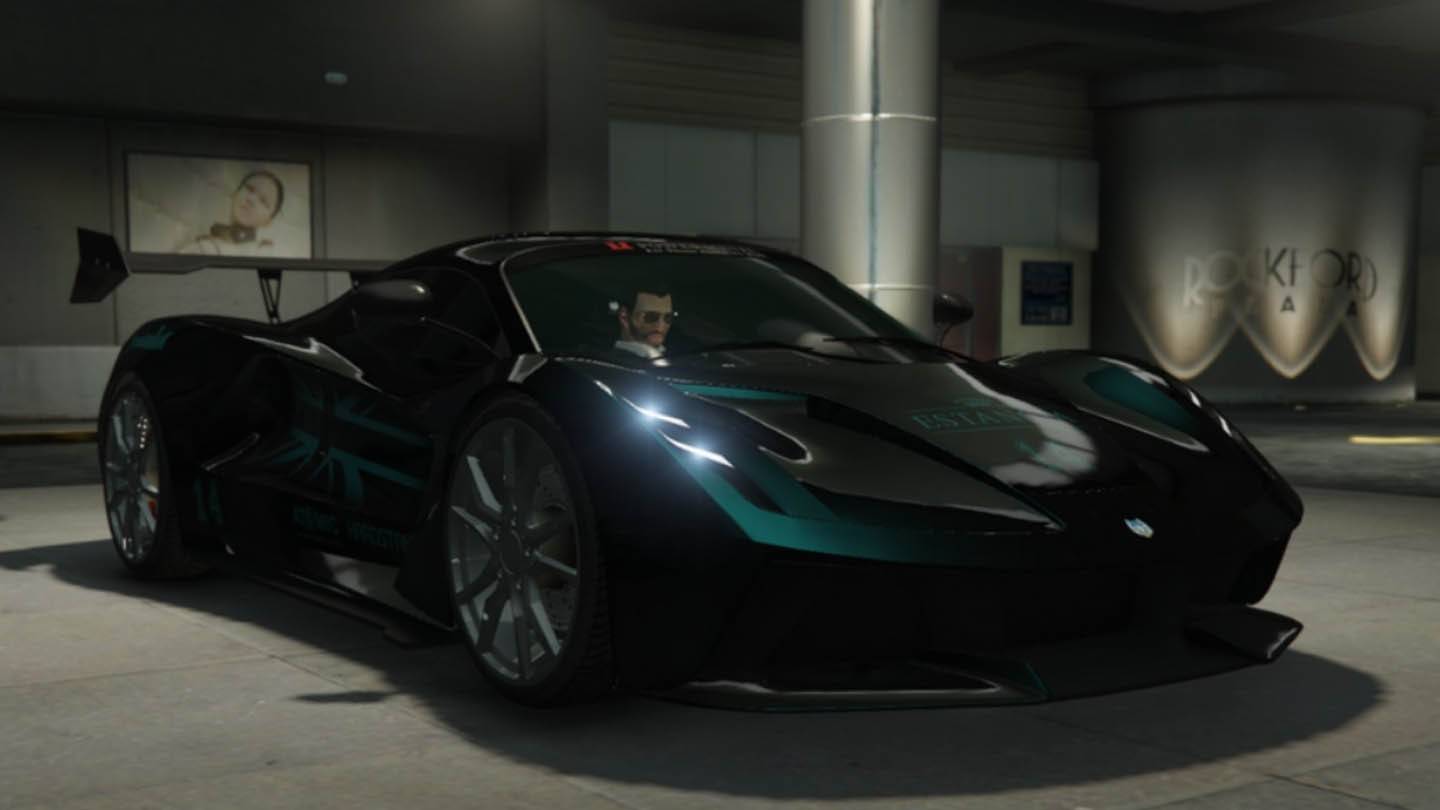
Rockstar Rolls Out Enhanced Edition of GTA 5 on Steam
Get ready for a major upgrade to your PC gaming experience! Rockstar Games is bringing the enhanced edition of Grand Theft Auto 5 to Steam. Following a name change on the Rockstar Launcher, the original game on Steam is now officially labeled "Grand Theft Auto 5 Legacy," while the updated version i
Prismatic Evolutions Shortage Prompts Pokemon TCG to Rush to Print More
The Pokémon Company is addressing a significant stock shortage of its latest Pokémon TCG expansion, Scarlet & Violet—Prismatic Evolutions. Read on to discover the cause of the shortage and the company's response.Pokémon's Latest Expansion: High Demand Leads to ShortagePokémon Company Increases Prod
Capcom Experimenting With Generative AI to Create 'Hundreds of Thousands of Unique Ideas' Needed to Build In-Game Environments
Capcom is exploring the use of generative AI to address the significant challenge of generating the vast number of unique design ideas required for its game environments – a figure reaching hundreds of thousands. This initiative reflects a broader industry trend, as rising video game development co

Heaven Burns Red Celebrates 100-Day Anniversary with Tons of New Content
Celebrate 100 Days of Heaven Burns Red!The Heaven Burns Red team is throwing a massive 100-Day Anniversary event, packed with new storylines, Memorias, and challenges! Running from February 21st to March 20th, this event is one you won't want to miss.Dive into Chapter 4—Part 2 and a captivating sid

Fortnite: How to Get Hatsune Miku
Quick LinksHow to Get Hatsune Miku in FortniteHow to Get the Neko Hatsune Miku Music Pass in FortniteThe iconic Japanese Vocaloid, Hatsune Miku, has arrived in Fortnite! Celebrate her debut with a range of cosmetics available in the Item Shop and the Music Pass. Whether you're armed with a rifle,
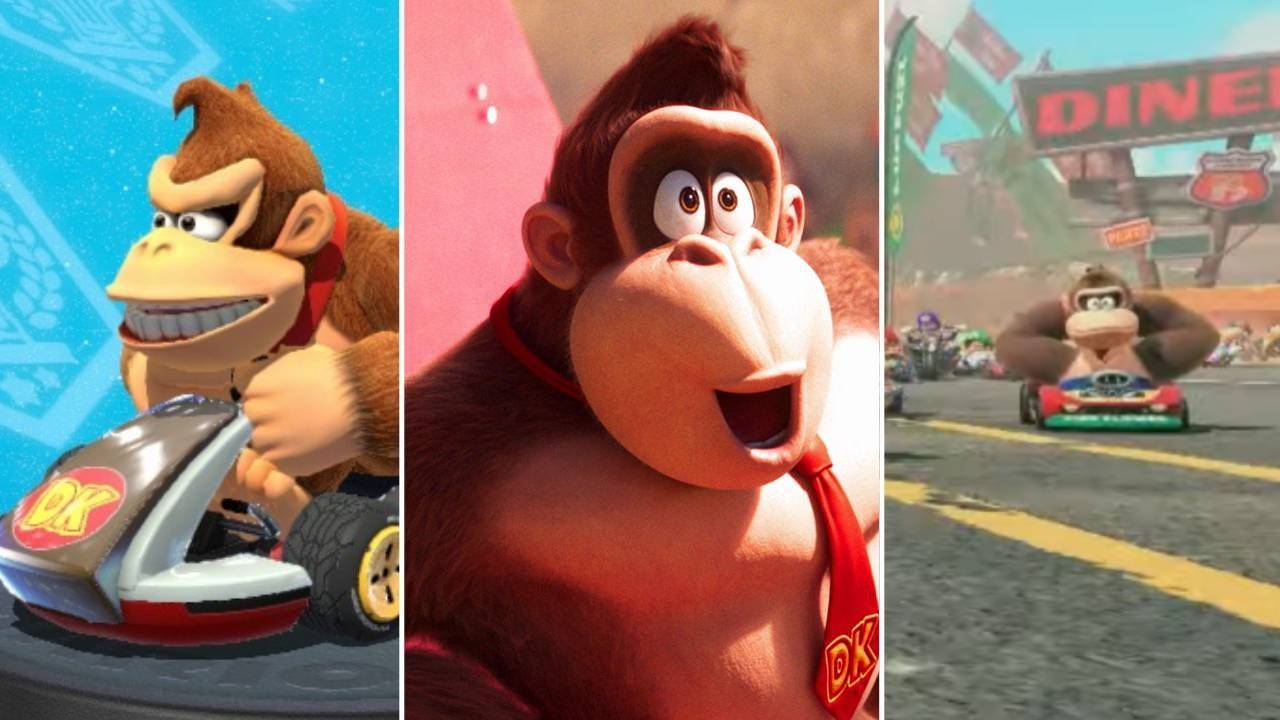
The Super Mario Bros. Movie Appears to Have Influenced a Major Mario Kart 9 Character's Redesign
Nintendo's recent reveal of the Nintendo Switch 2 and Mario Kart 9 has sparked excitement, but one character's redesign has caught the eye of fans: Donkey Kong. While most characters in the Mario Kart 9 trailer looked familiar, Donkey Kong’s appearance is noticeably different, seemingly inspired by
Latest Games

Being a good son
Casual丨812.05M

A clever name
Casual丨713.15M


Live with MILF
Casual丨523.49M

Arizona Unbridled
Casual丨1320.40M

3001: A MILF Odyssey
Casual丨314.00M

Hail To The King
Casual丨289.49M
Trending Games
MORE +

![Salvation in Nightmare [v0.4.4]](https://imgs.21qcq.com/uploads/36/1719555347667e551321c26.jpg)


Top News
MORE +

01
11-14
Dead by Daylight is Officially Adding Lara Croft
Lara Croft is officially coming to Dead by Daylight, Behaviour Interactive has announced. It had long been speculated that Tomb Raider's protagonist would be joining Dead by Daylight's Survivor roster soon, but Behaviour has now put the rumors to rest. Just over a month after the release of
02
12-11
Disney Mirrorverse Ends Service This Year
Disney Mirrorverse, the mobile game that brought together an epic mashup of Disney and Pixar characters in a brand-new universe, has announced its EOS. Kabam, the company behind the game, just announced that they’ll be pulling the plug on December 16th, 2024.As of today, the game has already been pu
03
12-11
Pokémon GO Celebrates 8 Years with Exciting Raids and Bonuses!
Pokémon GO is celebrating its 8th anniversary with a week-long extravaganza! The festivities begin Friday, June 28th, at 10:00 a.m. and conclude Wednesday, July 3rd, at 8:00 p.m. Get ready for exciting new Pokémon debuts, boosted event bonuses, and enhanced raid and trading opportunities.
Here's a
04
12-17
New Event: Seek Lost Fragments in Boxes
Boxes: Lost Fragments is launching a new in-game puzzle event! This event challenges players to unlock all 12 hidden achievements, revealing the game's deepest secrets.
Boxes: Lost Fragments, developed by BigLoop and published by SnapBreak, initially debuted on Steam before expanding to mobile plat
05
11-16
Krafton's Gamescom lineup to feature Dark & Darker Mobile, Inzoi and PUBG
Game developer Krafton has unveiled its upcoming Gamescom 2024 lineup!Check out what's going to be featured on the show floorInzoi, Dark & Darker Mobile and PUBG will all be representedGamescom 2024 is right around the corner, and it's one of the most-visited consumer gaming shows on the planet. Com
Topics
More +